CQ Origami pouch
Here is my second bag for the Paisley Bauble Bag swap over at CQN. These first two pics are of the pouch, completed, and the draw cords pulled.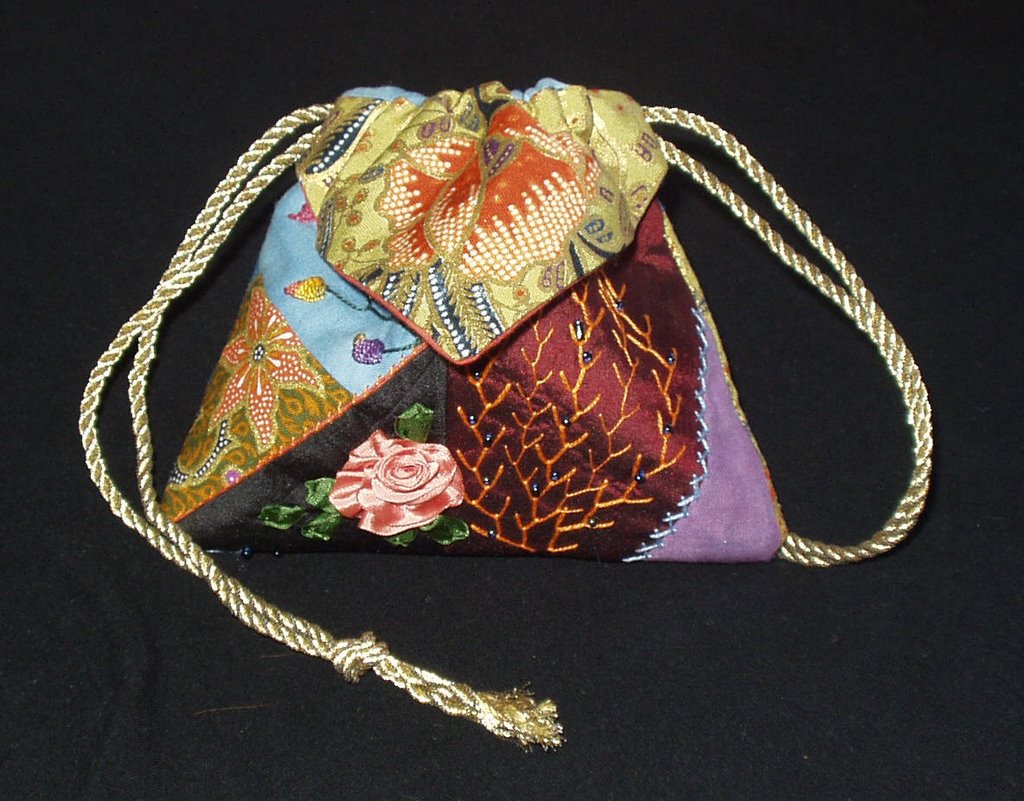
 ---------------------------------------------------------------------------------------------
 This is the block pieced, embellished, lined and turned. You can see there is only stitching in certain areas of the bag. I will point out here that these little bags are usually made with 2 fat quarters, a patterned and a plain. They are very easy to do. As I said in a previous post , I had pieced the block because I was too impatient to wait for the instuctions to arrive. You will see as I go,which bits end up on the inside. Here is a link to show you how to do these. I will persevere with how I did this, as it was a little different. ( i found this after I had made the block!!)
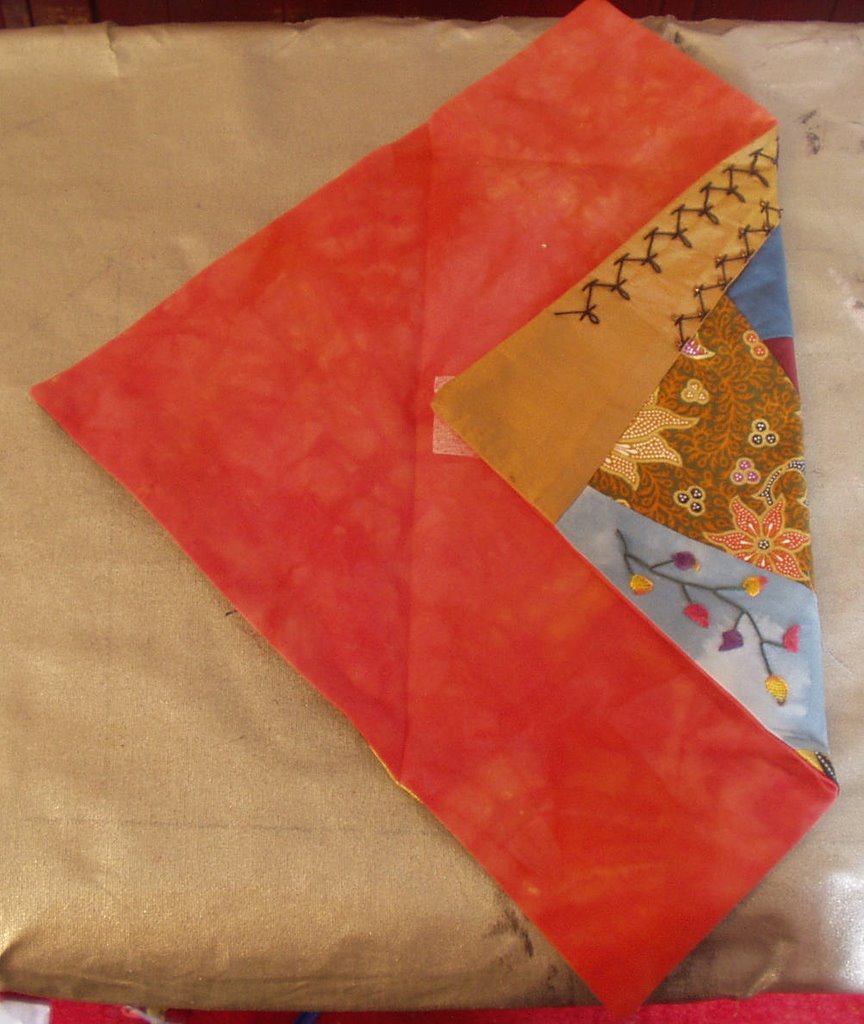 Turn your block on point, plain side up, fold one side in (note where the embellishment is). It must fold far enough in so that it touches the fold on the other side.
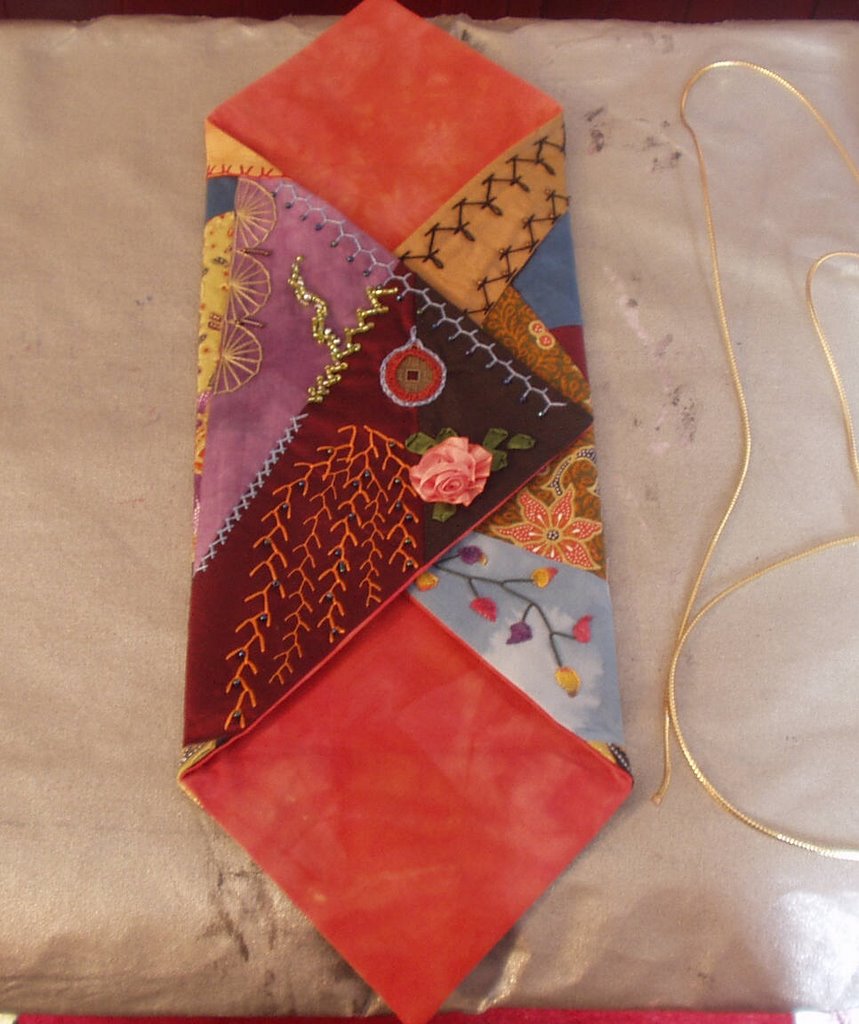 Fold the next side in. At this point you hand sew where the two sides overlap. On this piece it is mostly the black fabric. Just sew the top two layers..mind you dont catch the back! You only have to do it along that outside flap. This forms the pocket. The bit that is face down (apart from the flaps) is the inside of the bag, so you see, I could of saved a fair whack of pretty fabbies if I had waited!!
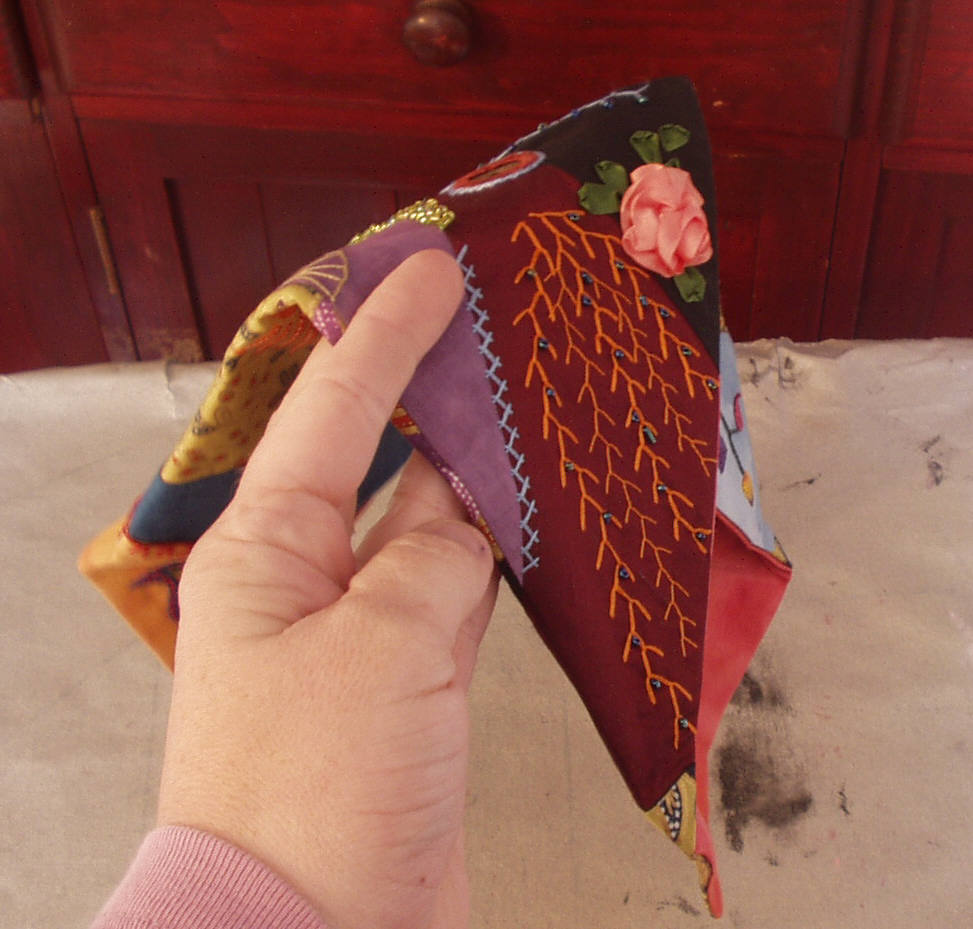
Fold the bag as in the pic above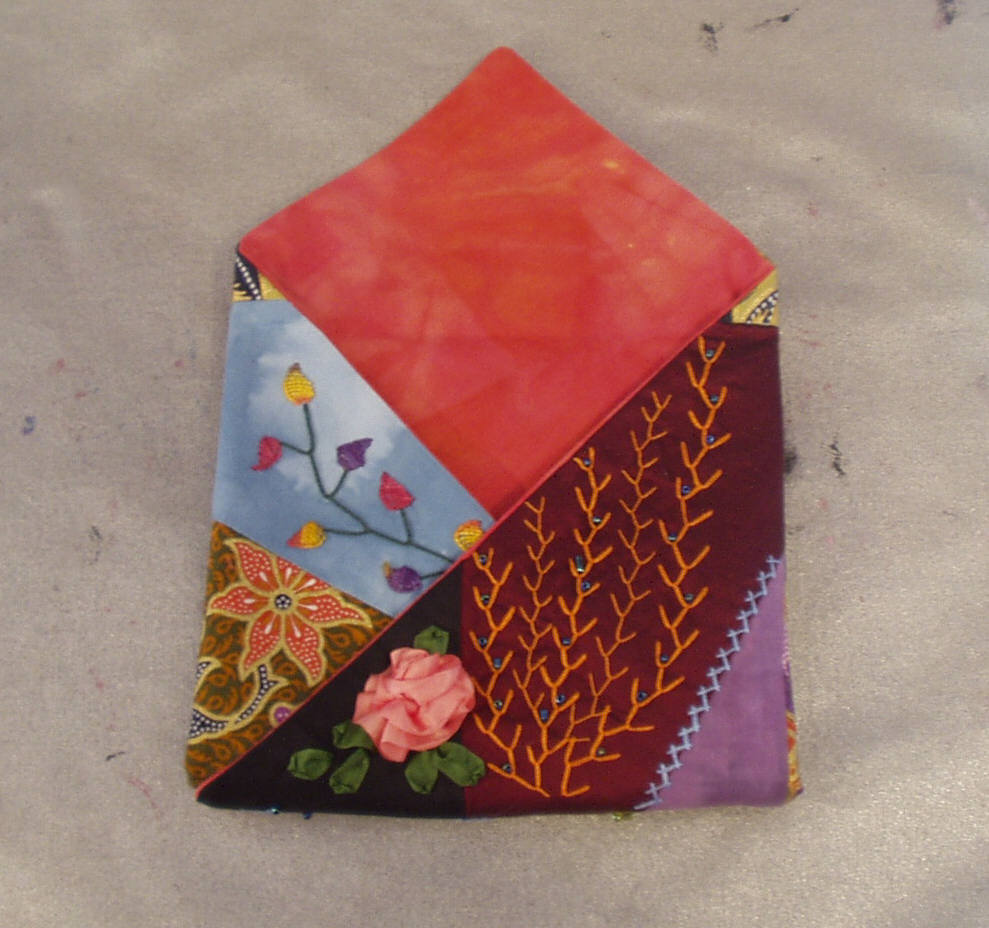 You can see now how the pouch will come together. At this point I hand sewed the sleeve, the turned inside out and stitched the sides up. You are supposed to do that corner thing to give a base, which I prefer, but it lost quite a bit of the stitching underneath, so I have left this one flat.
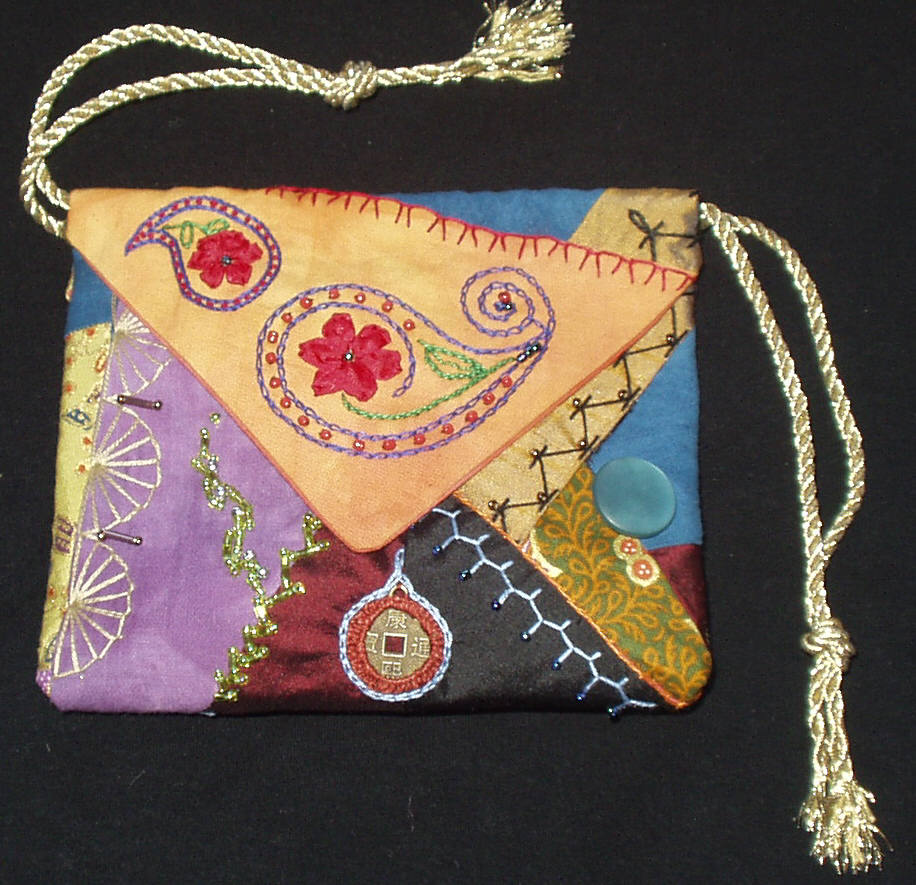 Here is this side completed, with the draw cords added. You can see how if I had machined the sleeve for the draw cord, it would of gone right across the embroidery. I hand stitched this. You can see how it should look in the pic below. That link will show you how to do the cords.
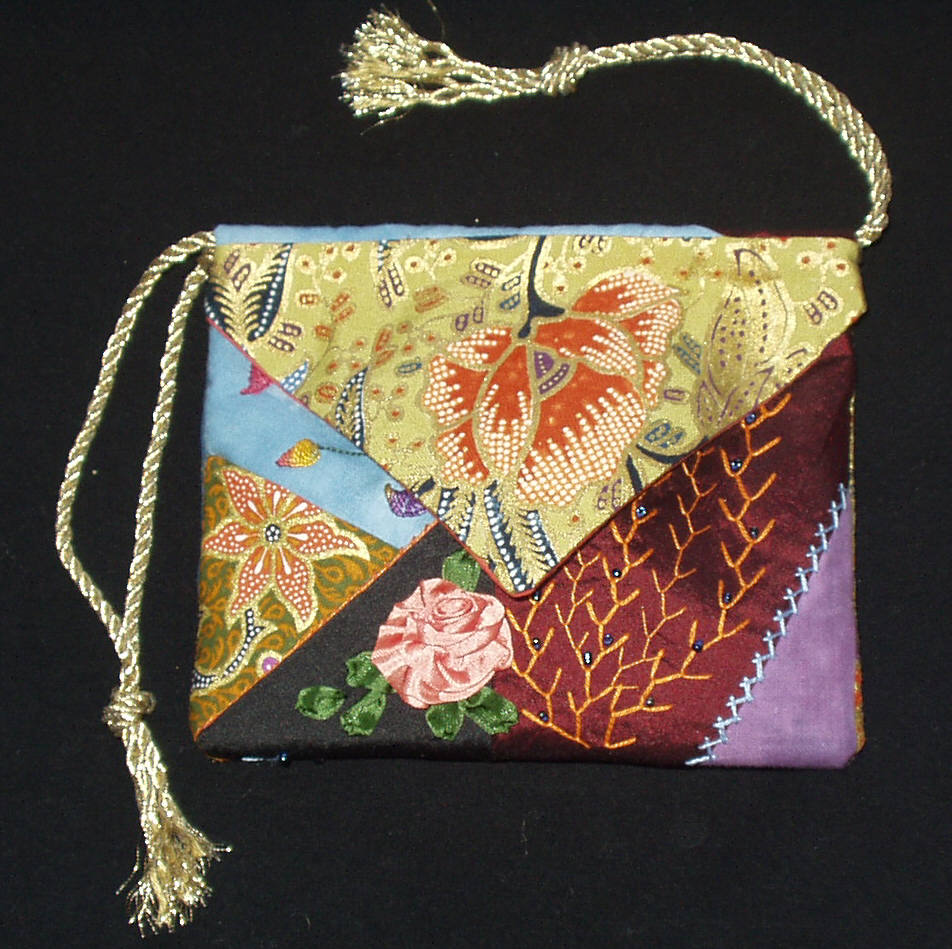 ...and here is the other side, with the flap closed, and below, the flap open, with a wee note inside.
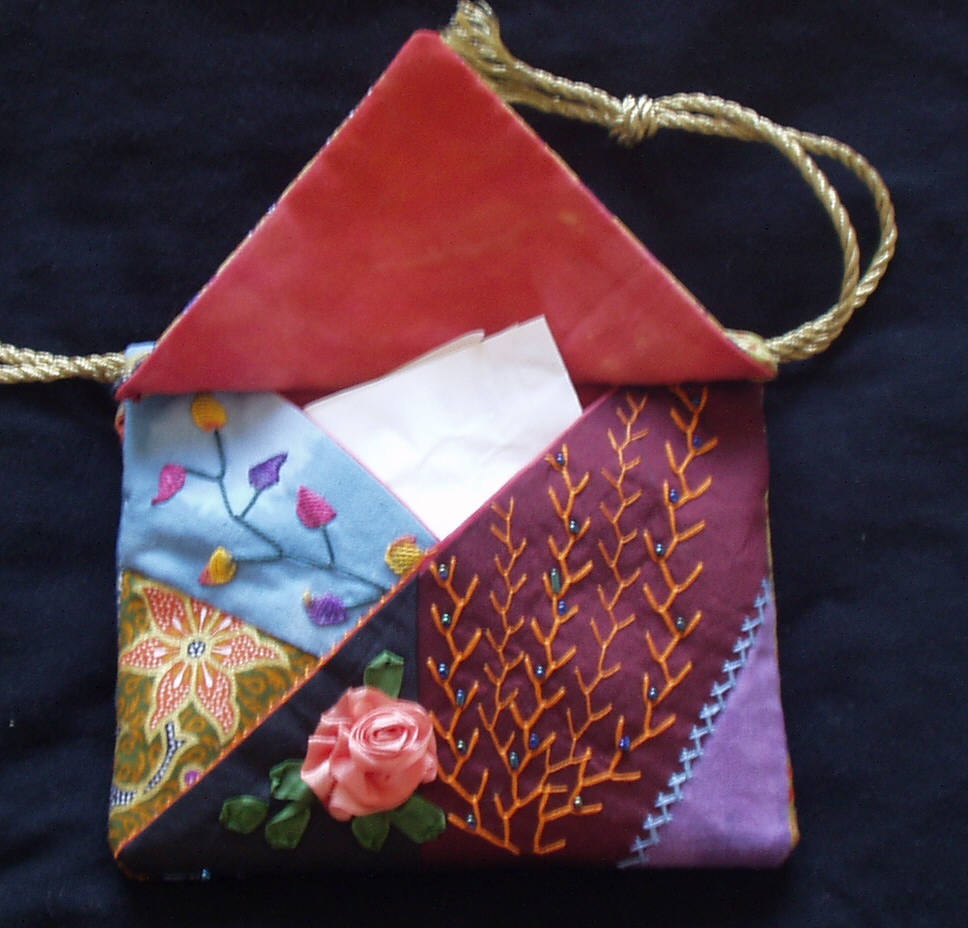 The finished size of my pouch is about 10cm x 15cm. I started with an approx 12" block. If you want a bigger bag, start with a bigger block!
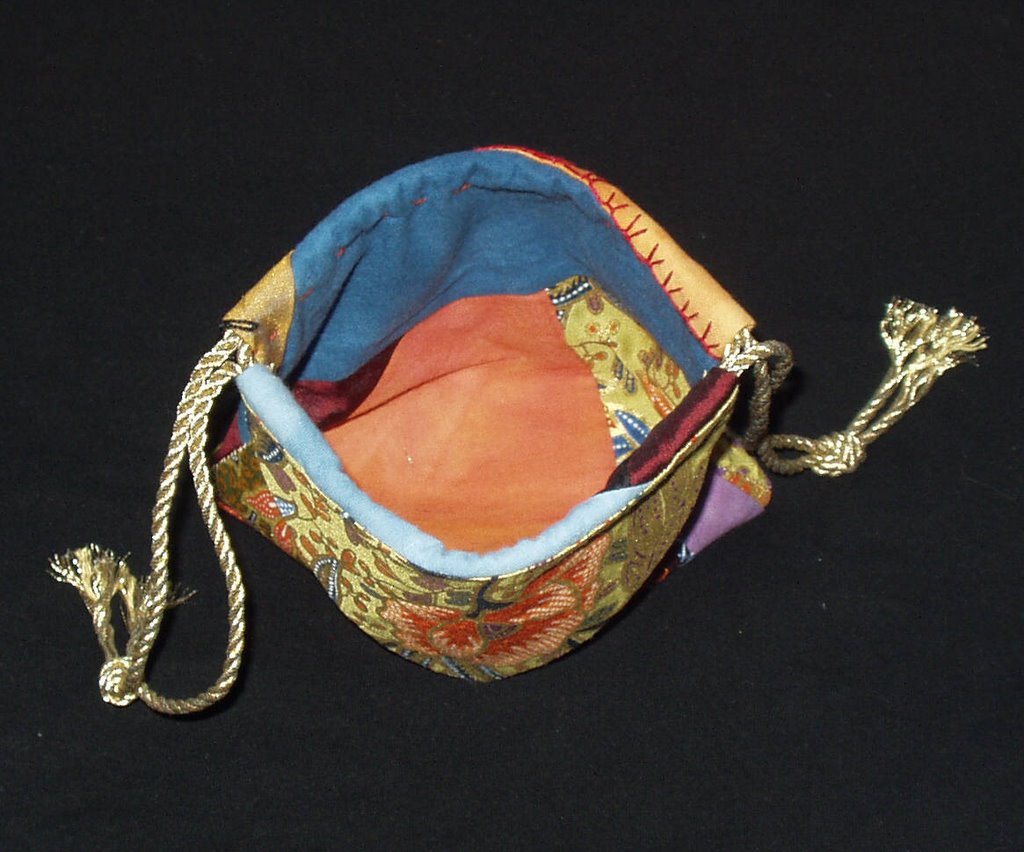 Here is the inside of the bag, and that *fantastic* orange fabric. So you end up with a small bag with two pockets. this one would be alright for a night out. You would fit your lippy, phone and money card in it, no problems.
Once I got started on the embellishing it didn't go to bad. All the colour was quite freeing, I didn't really think about what I used, just went for a good contrast. I am quite happy with how this has turned out.
If you have any questions, ask away. You will find Little Mochi's instruction far easier to follow.


17 comments:
This is really just absolutely fabulous! I am so impressed. :-) Thanks for the link to the pattern and the great tutorial. I really need to make one for myself.
I love this bag even more than the last one. That's a very pretty paisley bit on it, too.
That is so cool! I've got to try this one too!
I knew this bag. Usually we make it with some Japanese patterned fabric and solid one. But to use cq block is a very nice idea. Thank you for your instruction.
This is a lovely bag, Jo. I have been wondering what on earth I can use my block for. I think it may have far too much stitching on it to make this pouch, but I can stitch the next one a little less dense. Thanks for the inspiration.
Your bag is absolutely gorgeous! And I needed your descriptions to make sense of the other site's directions. I just love your work.
Wow. I don't have much computer time anymore - and boy have I missed out! Paisleys are my most favorite design in the world!
I love the bag and must have a go at making one!
Thanks Jo...
Forgot to say..."Yes the link works"....good one!
Oh my Oh my, but this is sure a lovely orgami pouch! I've made one in a black flower print but your's is so much prettier! Thanks for sharing.
This is an absolutly beautiful bag and I am defin going to try and make one. It looks simple enough but those are usually the ones that get me..Haha....Thanks for the tute..
Eve
Wow! I’m certainly gone try to make one. It seams so easy (believing it's not). Just have to make a CQ block. ..Then I will be back. I’ve bookmarked you.
HOLA! I just made an origami bag for my daughter, thank you for the great tutorial!
I have never seen this before. It is wonderful.
Thank you.
You are way smarter than I on this. My first attempt at following the pattern (I of course thought I knew how it worked so I didn't READ the pattern) was with only one piece of fabric - no lining.
It was for an exchange (and no the one piece was not CQ...I have to try that - it really looks great!) so I redid it!
Have you tried this one? I have done this with CQ work (again think about where you use thick fabric - that would be a lesson I learned afterwards AGAIN)...
http://www.modabakeshop.com/2009/02/valentine-pennie-pockets.html
Kathy (ordered two books from you the last week or two...)
Love your bag and blog. I am now truly inspired to start my crazy quilt. Thanks for sharing.
Post a Comment